Admit it: You check your smartphone more than any other device you’ve ever owned!
You find yourself eagerly waiting for that beep, chime or vibration that signals a new burst of dopamine- err, important information.
These notifications are enabled by the AutoSync feature on your Android phone, which enable you to be made aware of developments almost instantaneously.
Therefore, it’s probably wise to keep this feature on in the default settings in most circumstances!
However, if you find that you aren’t receiving these notifications, your AutoSync has probably been switched off. Sometimes, your Android phone’s AutoSync can even turn off on its own!
This can occur due to a variety of reasons, such as:
- User credential conflicts
- Bugs or glitches that may be present
- Certain app settings
- Poor internet connection.
So, what can you do if your Android Auto Sync keeps turning off?
In short, there are a few potential solutions available to you in this situation, including clearing the cache and data, enabling background refresh, confirming account credentials, and fixing any present bugs.
So, if you are wondering why the function keeps turning off and how to stop it from happening- this article will tell you everything you need to know!
Android Auto-Sync Issues: An Introduction
It’s not only annoying when Android AutoSync fails- it can potentially have grave consequences if you need to stay up-to-date with important notifications in your everyday life!
Having auto sync turned off can result in you being late in responding to a vital email from your boss, or failing to attend an emergency company meeting.
Missing notifications can cause a wide variety of headaches for any Android user.
So, what actually causes an Auto-Sync failure?
Causes Of Android Auto-Sync Failures
Before you start jumping down the rabbit hole troubleshooting the cause of your Auto-sync failure, the first thing that you should do is confirm that you actually have your phone’s AutoSync turned on!
The steps may vary amongst different smartphones, but they are usually very simple.
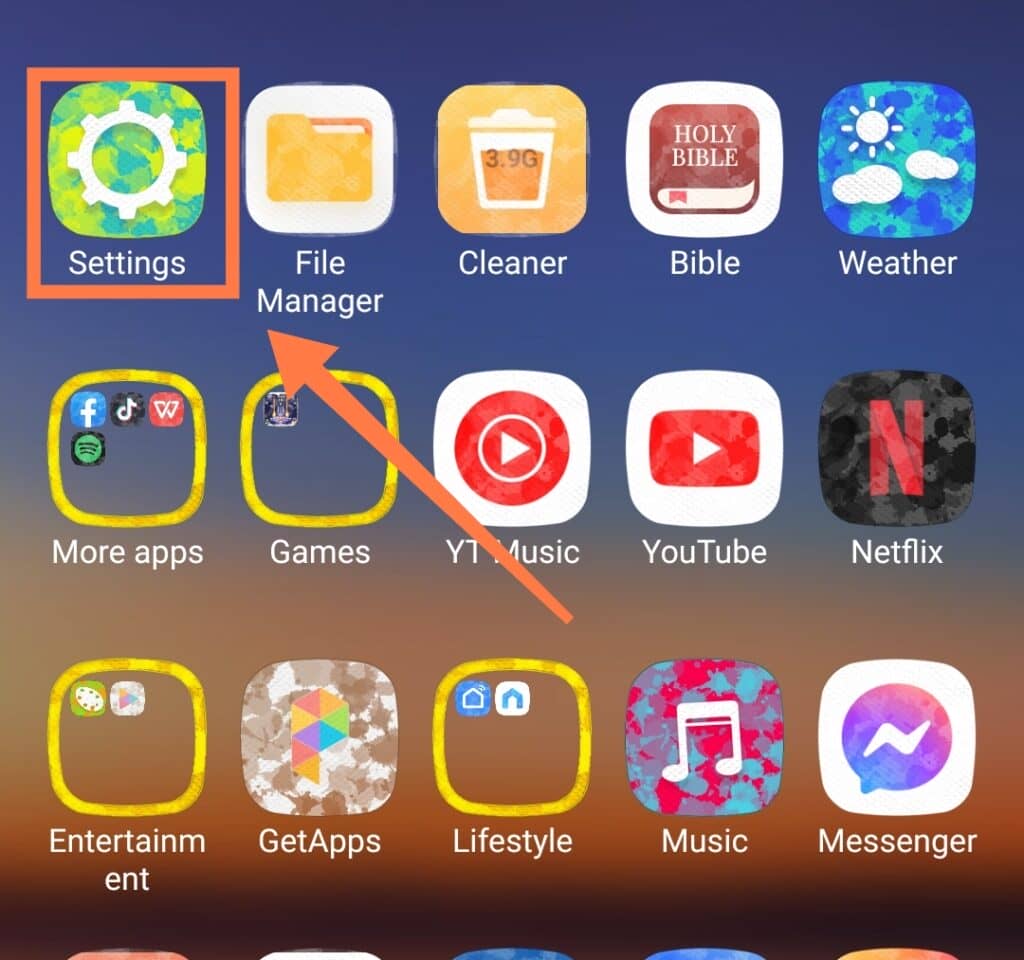
Firstly, go to your phone’s Settings, then search for Accounts and Sync.
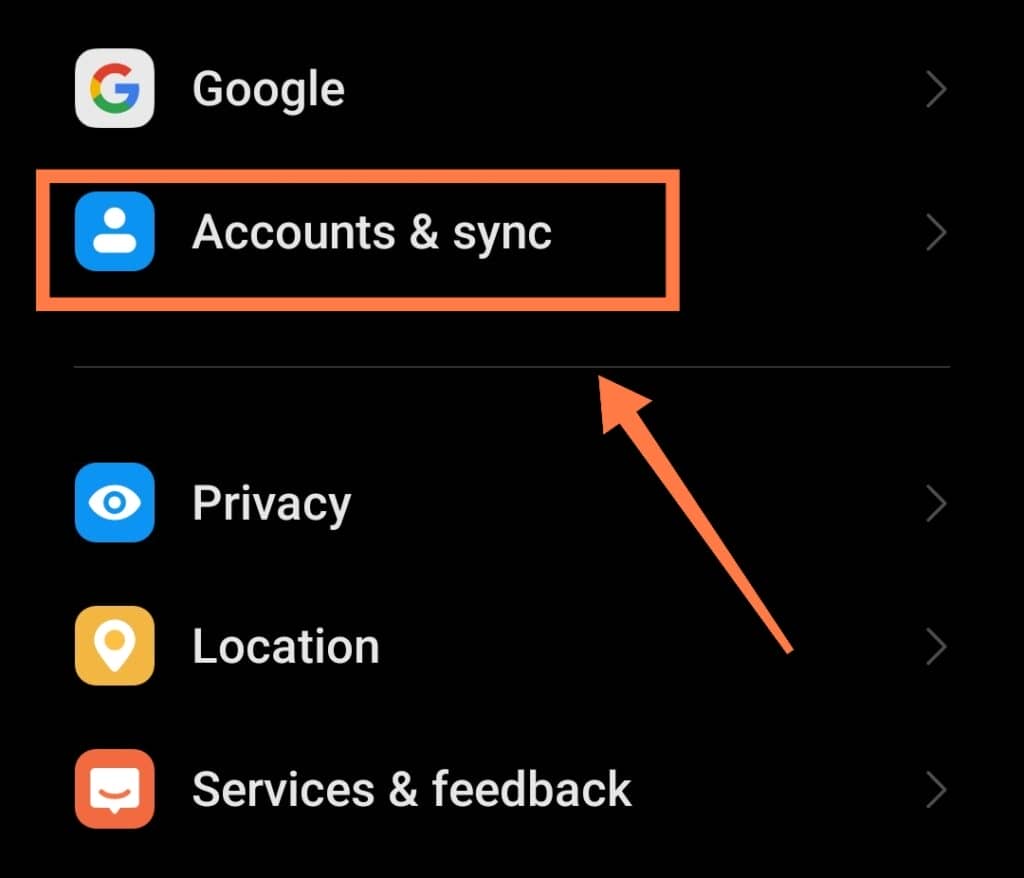
There should be an Auto-Sync toggle on the page; simply turn it on to enable auto-sync!
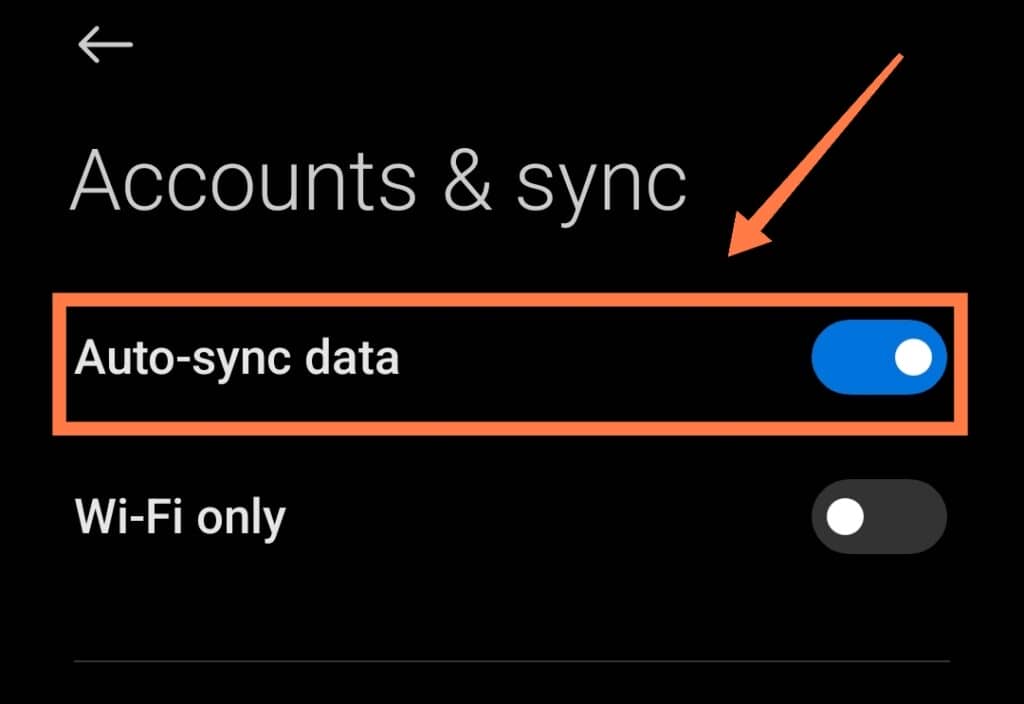
If you have already done this but are still having problems, here are some other possible reasons your Android auto sync keeps turning off:
User Credential Conflicts
One of the most likely causes of Android auto-sync failure is when the sync feature cannot verify your username and password with the Google apps on your device.
As long as this conflict exists, sync will not push notifications and new messages to your devices!
Bugs In The Operating System
If your settings are correct and the auto-sync keeps turning off, there could be a bug that’s causing the problem.
The bug or glitch may be constantly undoing the action of turning on the auto-sync toggle, or interfering in the process in some other way.
Aggressive Battery Saver Or Task-Killer Apps
Auto-sync is a feature that is constantly running in the background.
As such, it can be flagged by the Battery Saver function or app as an unnecessary service.
As a result, the feature will keep turning off Auto-Sync until you intervene, and the cycle will keep repeating until you adjust your battery saver settings.
Task-killer apps that you can download from the Google Play store have a similar function in aimi NC to preserve system resources and direct them to active apps.
Again, as background activity, the auto-sync feature is usually one of the first functions that are switched off!
Poor Network Connection
Your settings and app preferences for auto-sync may be aligned well, but if you are currently in a region with poor mobile network reception this can affect auto-sync effectiveness as well!
This is because, with poor internet connectivity, it will take more time for your app notifications and messages to sync.
Syncing may also prove to be entirely impossible if network coverage becomes even worse!
How to Fix Android Auto-Sync Failures
Check your Internet Connection
Besides checking whether you have property enabled Android auto-sync, you also need to make sure you have a stable internet connection.
Check your Wi-Fi connection speed, mobile data connection plan, and data balance to ensure that you have a viable online connection.
Confirm your Google Account Credentials
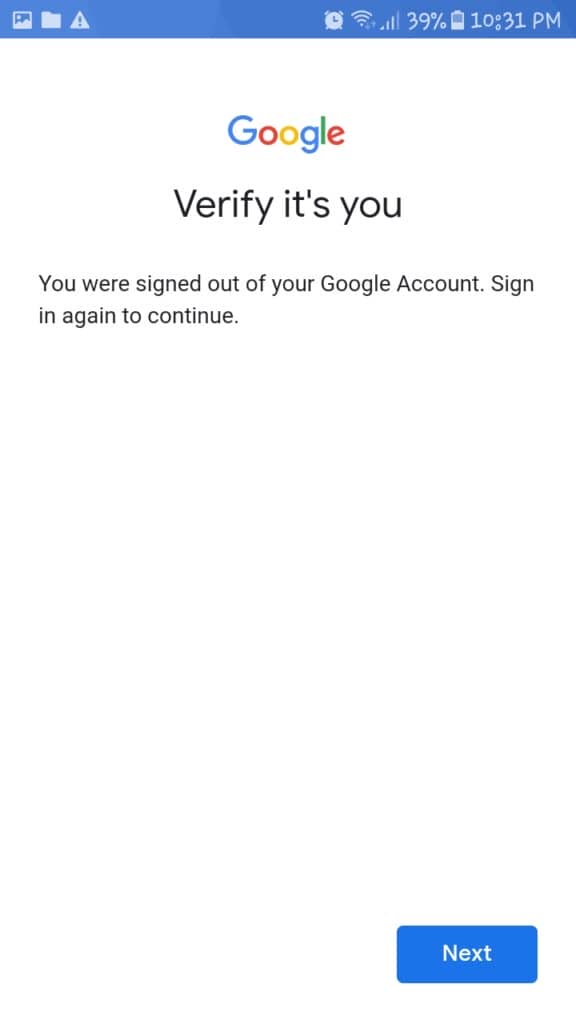
If you recently changed your Google account login credentials, you will need to update those details in your smartphone.
It is wise to update these details across all of your devices- not just for syncing purposes, but also for the security benefits.
Resolve Those Bugs
An excellent way to get rid of bugs that may interfere with auto-sync is to update your phone’s OS (operating system).
OS updates usually contain bug fixes from the developer that resolve previous known issues.
Apart from that they also improve your phone’s security, ensuring a safer distribution of your notifications and messages.
Reset Your Account
You may find that you have to remove and then re-add your Google account (or other accounts) if it potentially has a syncing problem.
The aim here is to realign the account in case there are any conflicts currently.
You can do so by going into your phone’s Settings, then into Accounts and sync. There, you should see the Google account; select that and click on More then Remove account.


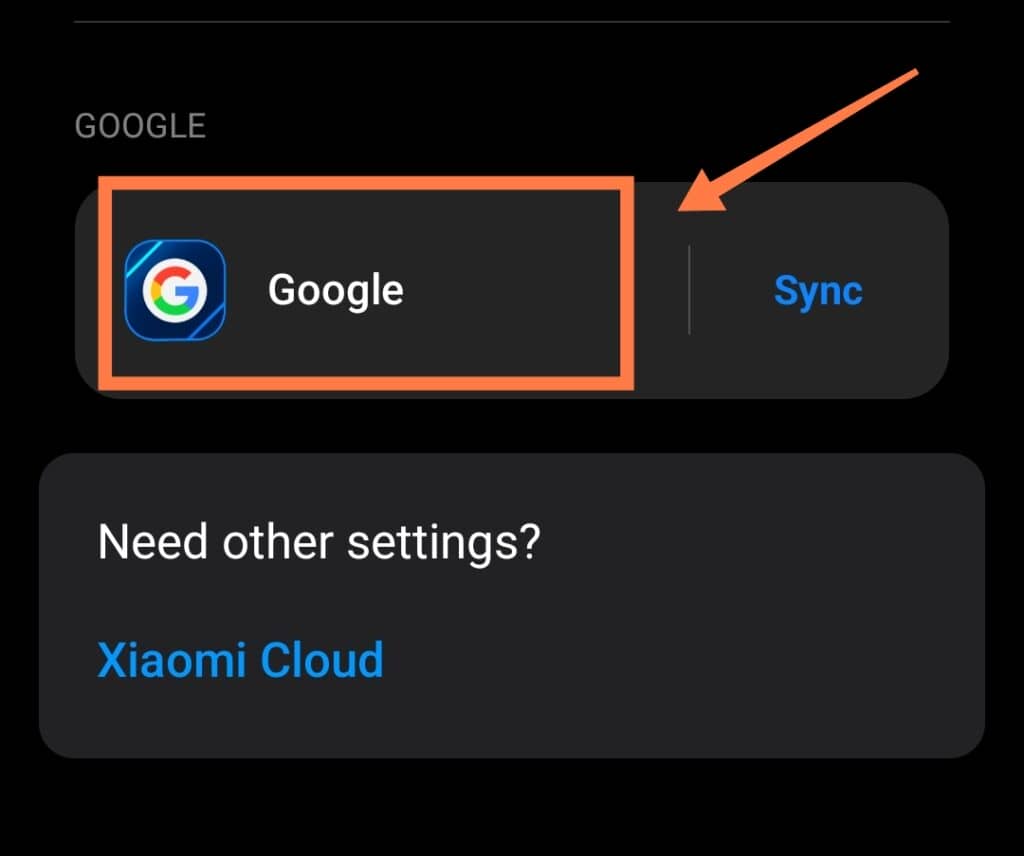
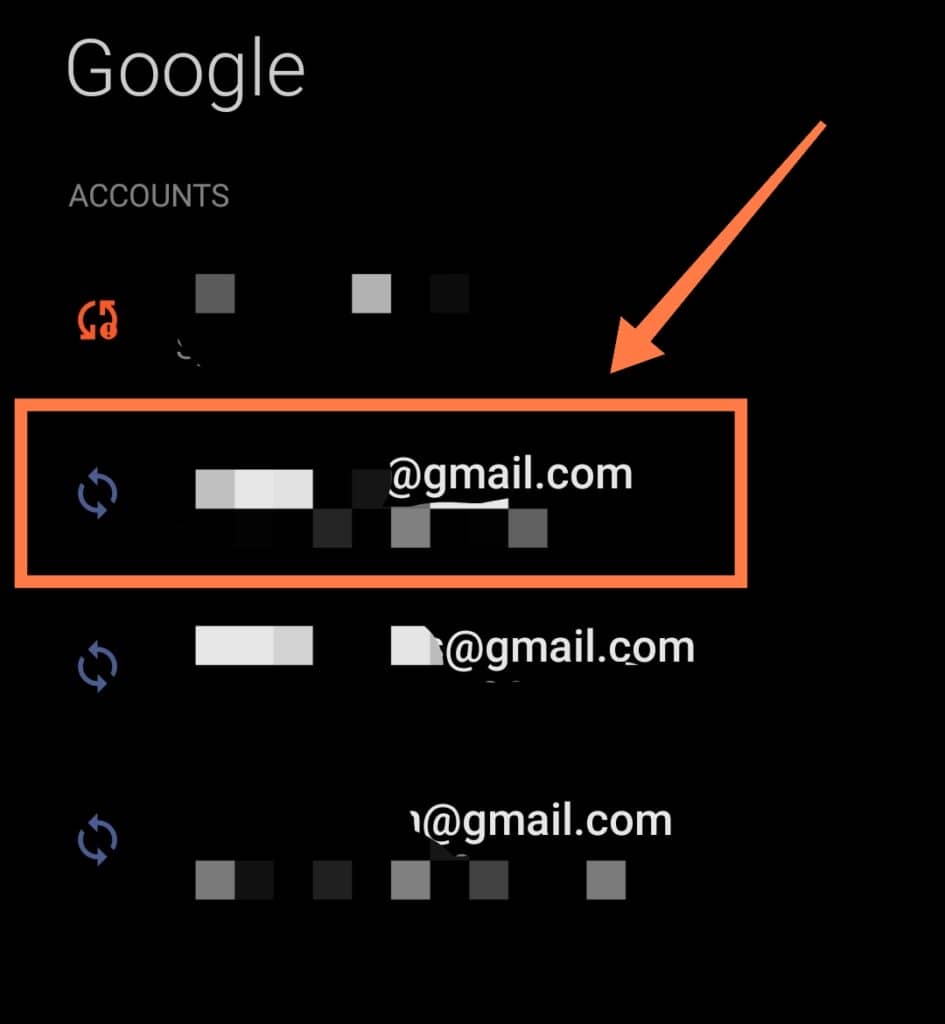
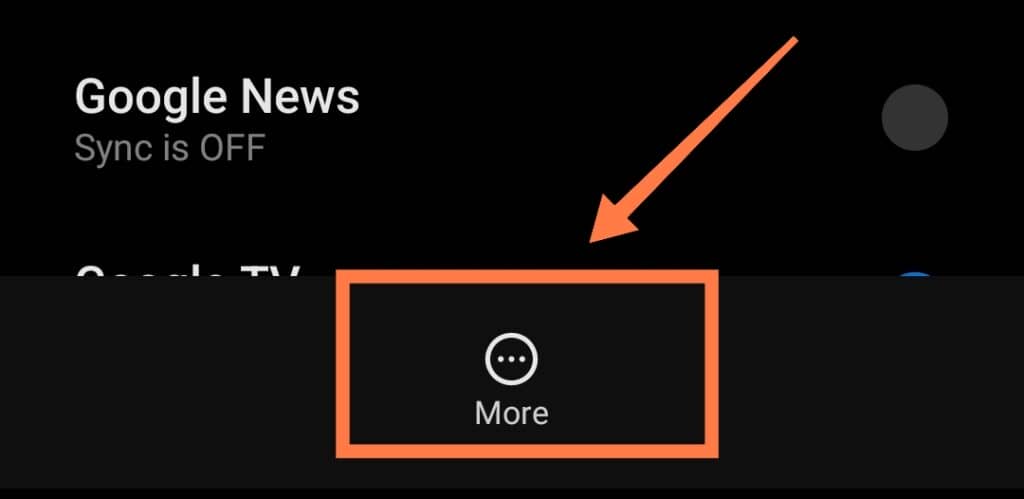
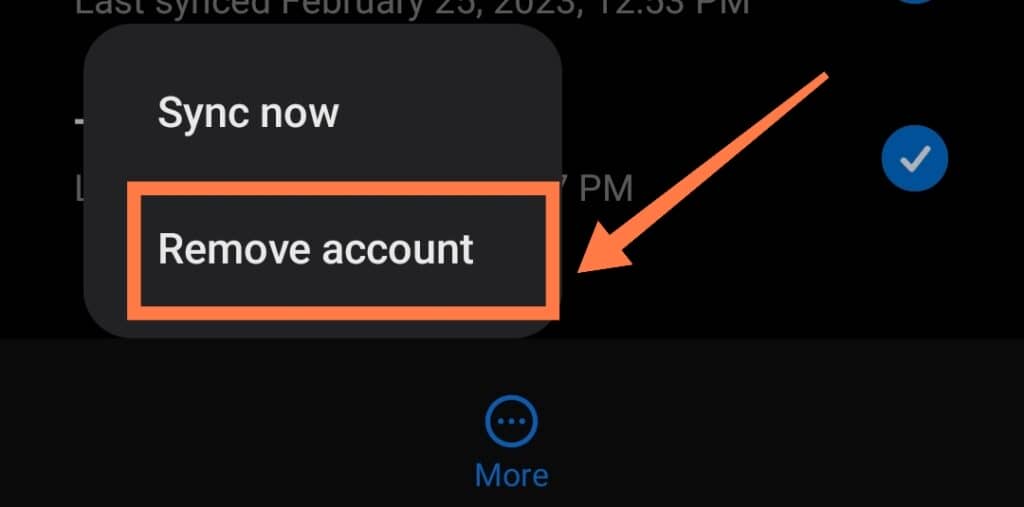
Follow the prompts to complete the process. Once completed, you will then need to add the account again.
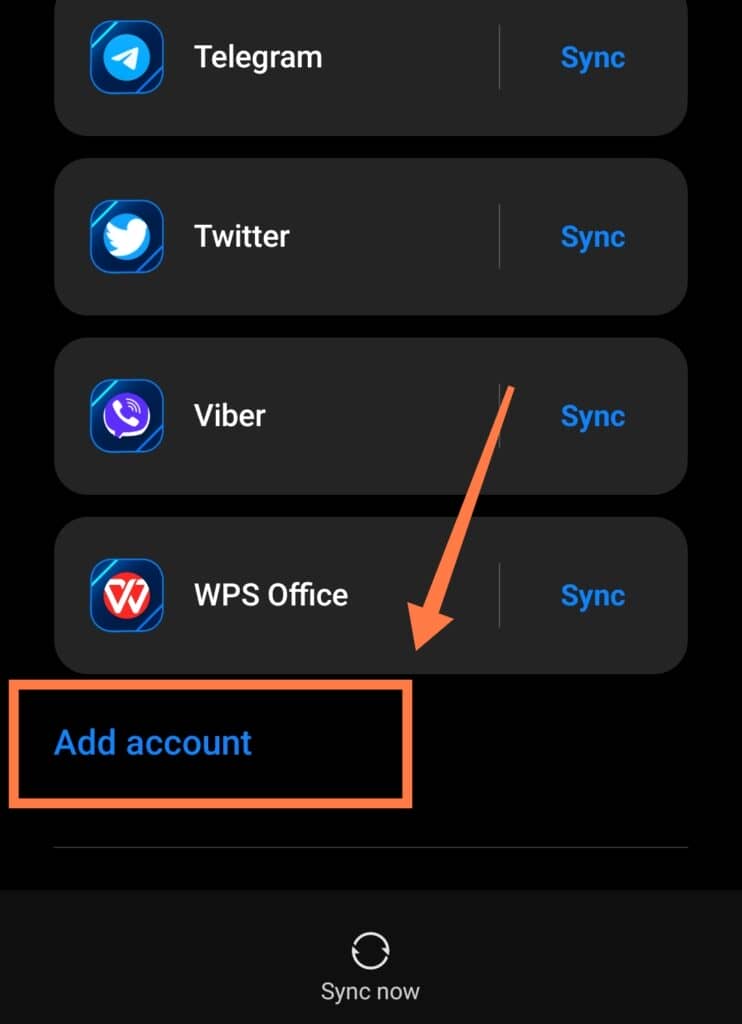
Go to the phone’s Settings, then to Accounts and sync. At the bottom, tap the Add Account button.


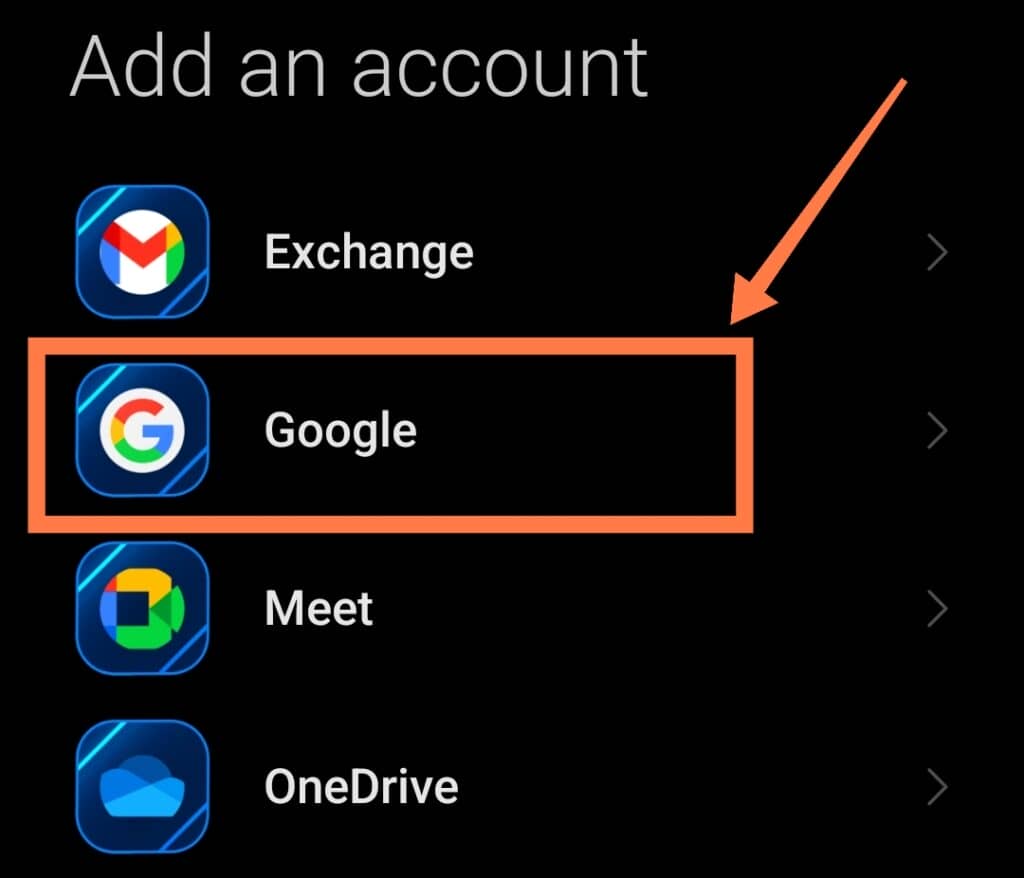
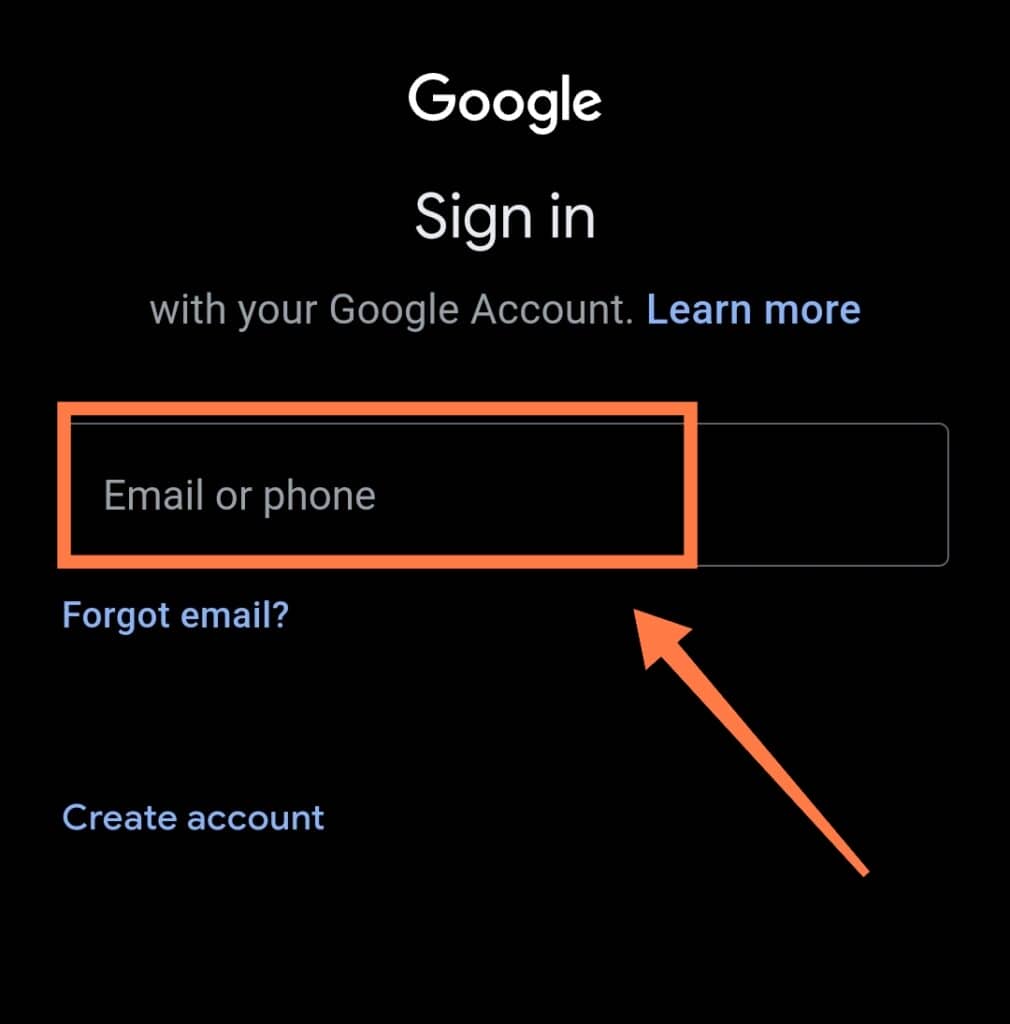
Under the Type of account, choose Google. Finally, input your account username and password.
Review Battery Saving And System Resource Preferences
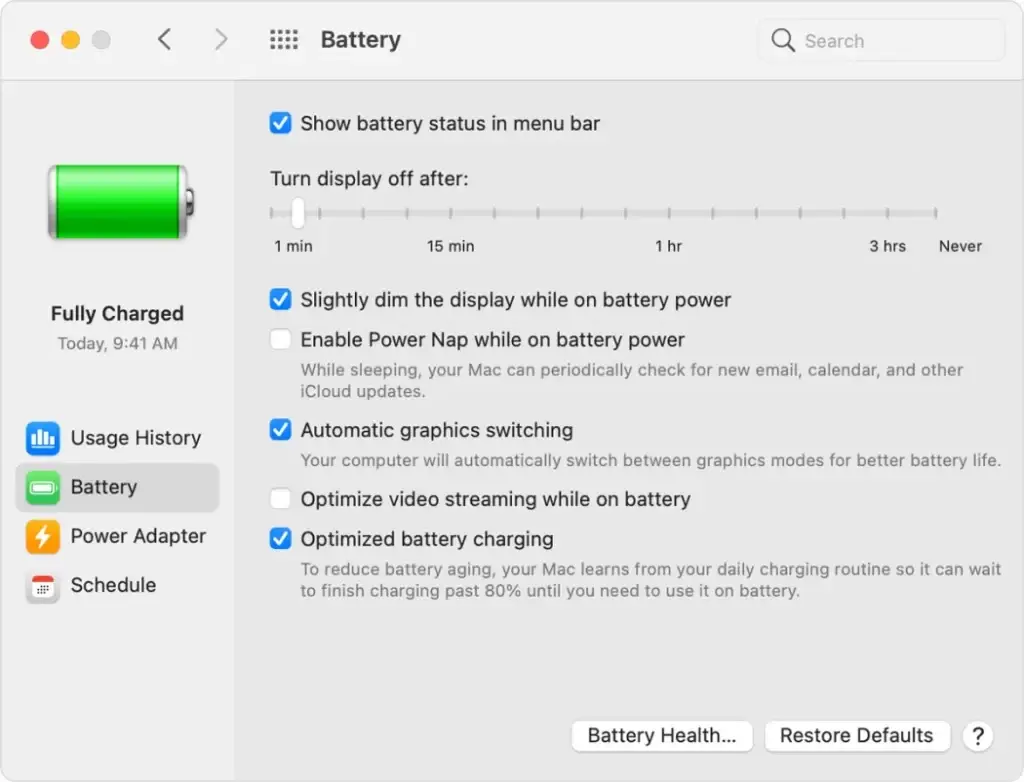
If you have an aggressive battery-saving app, you may need to review its settings concerning your Google account sync preferences. The app should have the ability to override its current settings surrounding auto-sync.
The same needs to be done with any task-killer apps you may have. The app should allow you to make exceptions for auto-sync, thus preventing future interruptions.
Enable Automatic Date And Time
Auto-sync may fail to work because you have not enabled the automatic date and time.
You can enable it by going into Settings, then searching for Date and Time.
You need to expand the Date and Time tab to view the Automatic date and time and Automatic time zone options. When you find this, click on their toggles to enable it.
Enable Background App Refresh
If you have performed all of the above steps and you still have an auto-sync failure, you will need to examine specific apps on your phone more closely.
Android system management may restrict certain apps (such as Facebook Chat) from refreshing in the background. This restriction is to help prevent the user from accidentally incurring a hefty mobile data bill.
Most apps are able to sync when connected to Wi-Fi but restricted when using mobile data. Therefore, you may need to manually override this to enable background refresh for apps like Gmail even when you are using mobile data.
Clear Cache And Data
Apps tend to collect and store specific data and cache memory in the phone.
This enables faster app loading and minimizes server load when you use them. Over time, that data grows dated and can also become corrupted.
To clear the cache, you will need to go to your phone’s Settings and to the App management tab.
Search for an app such as Gmail that is being affected, and clear its data and cache.
After this, you may have to log in to the app from scratch again. When you reload the app, you will hopefully find that new messages pop up as soon as they are available!
In Conclusion
So, as you’ve no doubt experienced for yourself, many things can go wrong when your emails, messages and other essential communication apps are out of sync.
A smartphone is only really useful if it can keep you informed, up to date and well organized. Android auto-sync is an integral part of this.
There are several different reasons as to why your Android auto sync keeps turning off, and thankfully there are effective solutions to each of these.
Hopefully this article has been helpful to you, and I hope that you never miss an important notification again!
