Live Photos are like mini clips that can beautifully capture short moments in your life.
However, when it comes to iPhone Live Photo quality, changing keyframes can drastically lower the standard of the image.
In this article, we’ll explain all of this and more to help you get the best use out of Live Photos!
What are Live Photos, Exactly?

One of the awe-striking features of an iPhone is its ability to produce a live photo. Interestingly, these are not regular photos, but they’re not standard videos either!
While we can share live pictures like every other image, they are also like short video clips or stop-motion animations.
If you’re wondering why these Live Photos are likened to short video clips, here’s your answer: When you take a picture, your iPhone stores the brief 1.5 seconds before and after taking the shot, then play it like a video clip.
iPhone Live Photo was first added to iPhone 6S in September 2015 to bring new life to pictures. While Live Photos may not seem all that special now, you still learn to appreciate their magic when you look at them months or years down the line.
The beauty of the iPhone Live Photos is in its automatic operation. These photos are automatically captured unless you turn off the feature manually. This gives you a nice selection of clips to enjoy as you reflect on older memories.
There is much speculation on whether the quality of an iPhone Live Photo is lower than a normal picture. When you take a live shot, your iPhone saves a very high-quality key image.
However, note that when you change the keyframe, these photos will zoom in and extract a frame from the video clip. Unfortunately, these no longer have the same quality as the original keyframe.
What Is the Point of Live Photos on an iPhone?
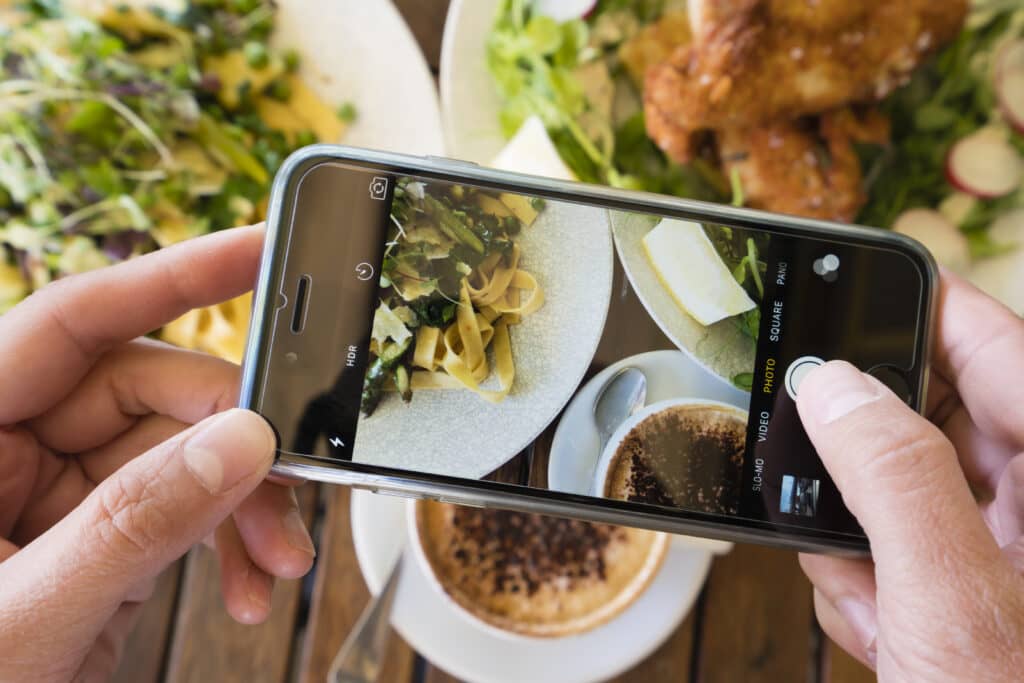
The benefits of Live Photos are hard to overemphasize. With this feature on your iPhone, you get more than a great picture.
You’ll also be able to capture tiny details coupled with movement and sound, which is something you just can’t achieve with a still photo.
Many people are interested in making the most of this iPhone feature, but they’re not all that clear about how to use Live Photos on their phones!
How Do You Turn On the Live Photo Feature on an iPhone?
The first step is to open the Settings app and locate the Camera icon.
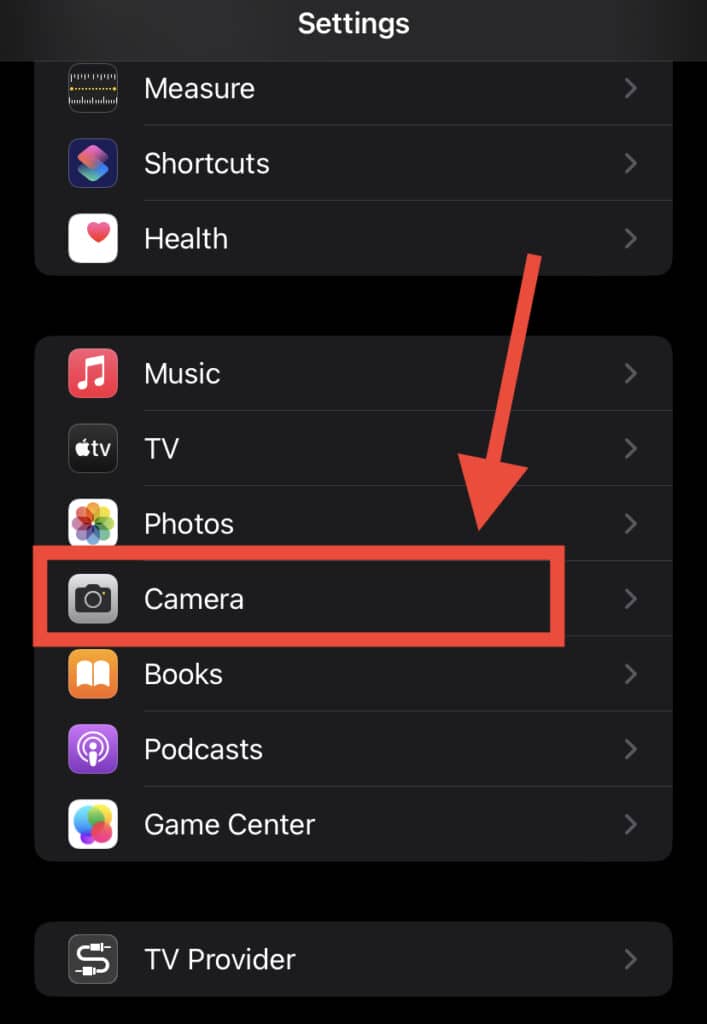
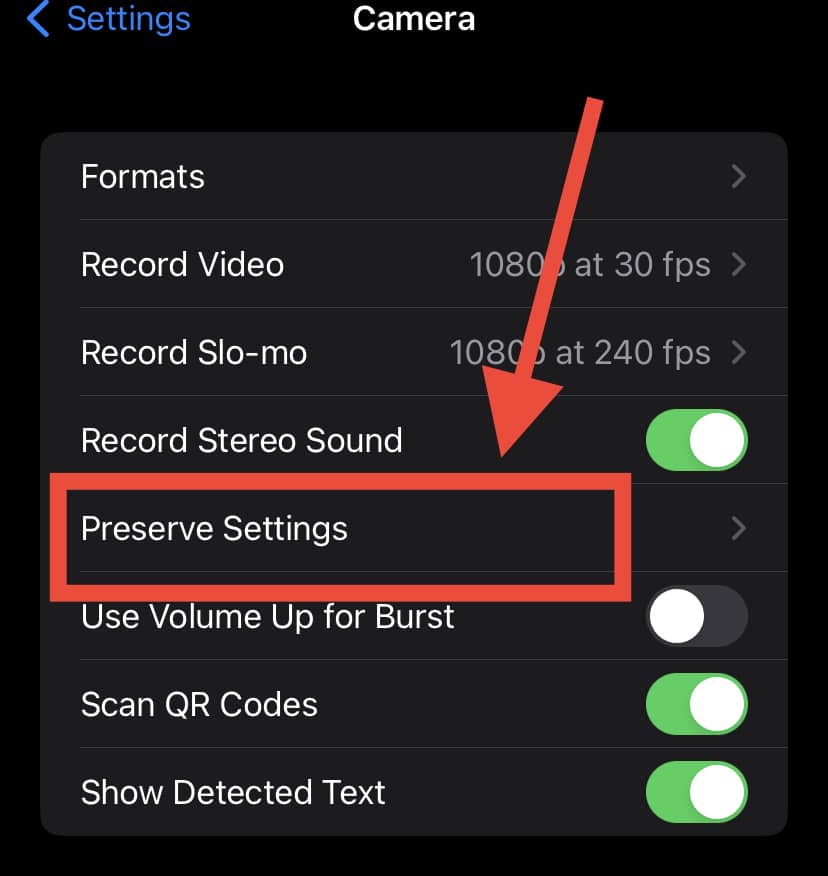
Within the camera settings, click on Preserve Settings.
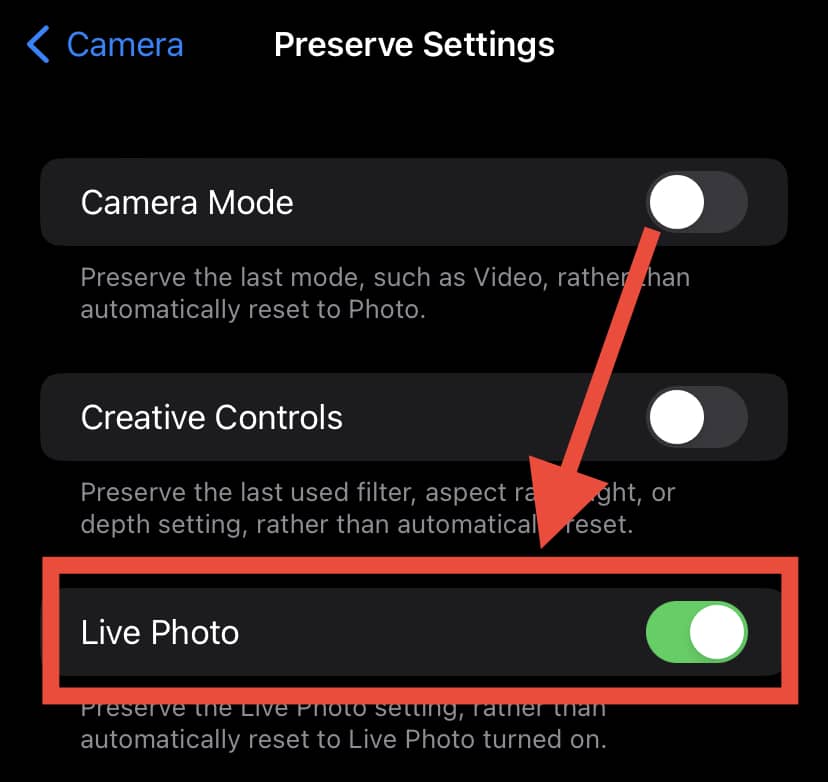
After that, ensure that the switch next to Live Photos is on, indicated by a green button.
How Do I Turn off Live Photos for Taken Pictures?
To locate the Live Photos you have taken, go to “Albums,” swipe down to Media Types, and click on Live Images.
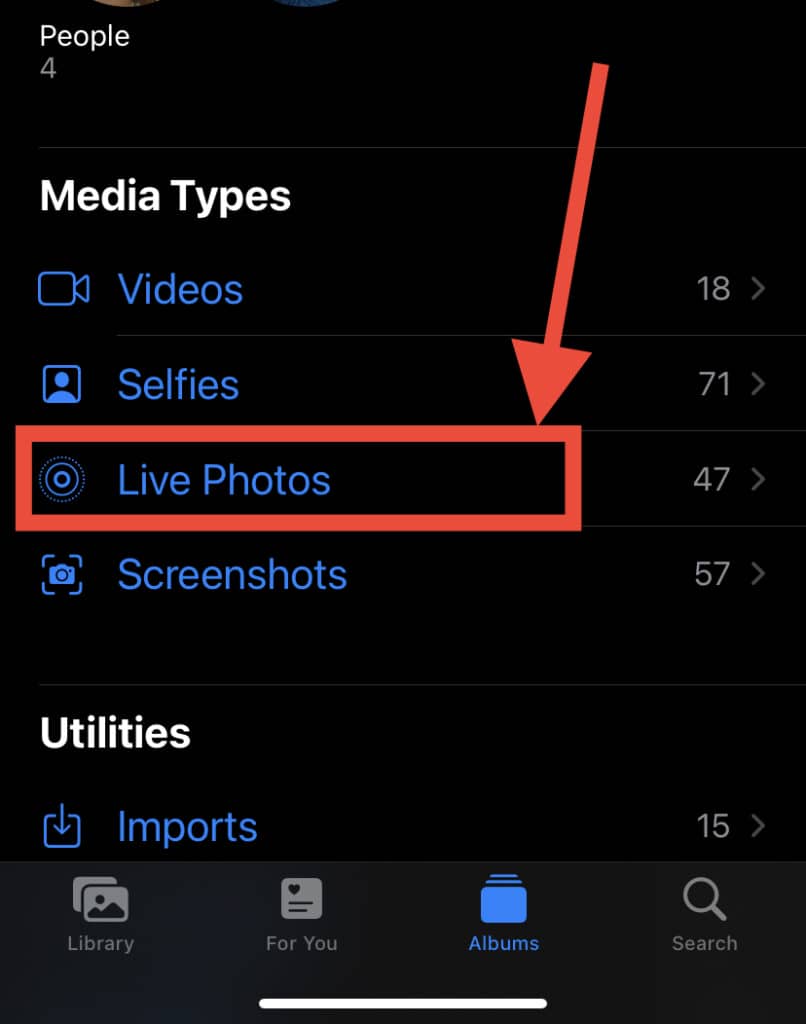
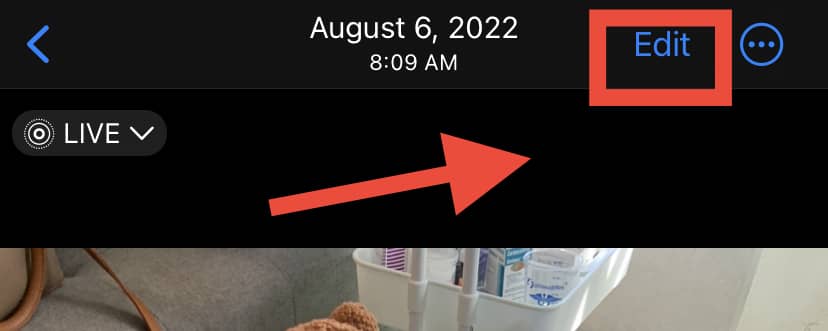
Then, open the Photos app and choose the picture you would like to remove the live feature from and click on “Edit” at the top right corner.
How Do I Take a Live Photo?
This is relatively easy as it isn’t different from taking regular pictures!
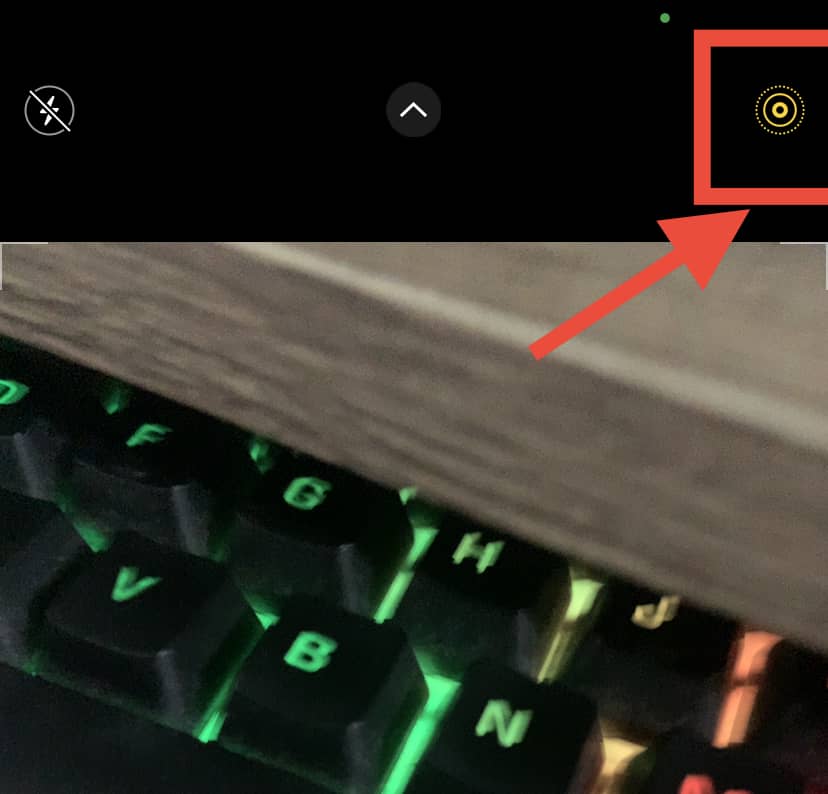
First, open the Camera app and ensure that Live Photos are turned on. A symbol at the top of your camera will show that the Live Photos is on. Then, simply hold your device and tap the shutter button to save your memories as you usually do!
Do Live Photos Take More Storage Space?
According to Apple, Live Photos are 12-megapixel still images. They are larger in size than normal photos as they store other movements with the taken shot.
Additionally, Live Photos combine this 12-megapixel image with a 3-second-long short video clip. As a result, a live photo file takes about twice the space when compared to a still image of the same resolution.
How Do I Fix Live Photo Quality?
There is a solution to somewhat remedy blurry Live Photos on your iPhone. Recently, Google introduced an app that can fix this problem called Motion Stills.
What it does is it freezes the background of a picture. Once the background is still, only the movement at the center of the frame is captured. This produces a stabilized, smooth, and more compelling live photo.
Google invented this impressive technology by stabilizing numerous videos, and there are plenty of positive reviews of the app.
Notably, Motion Stills does not need an Internet connection to work. For this reason, it’s certainly a handy app to have on your iPhone to enjoy quality Live Photos!
Can I Change Live Photos to Normal?
Since Live Photos take up more space than still images, you might want to change the former to the latter to conserve space.
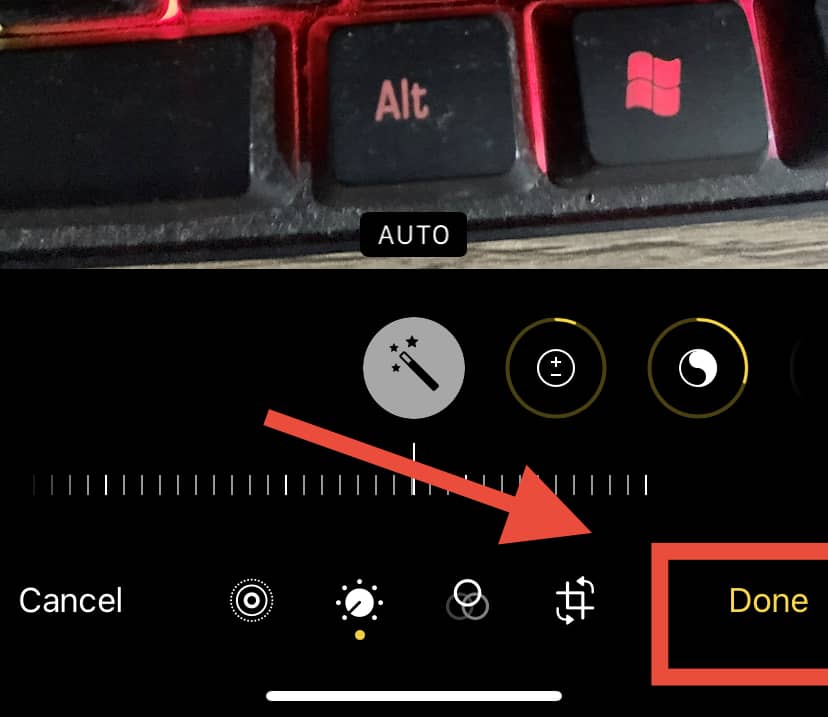
Carrying this out is a relatively straightforward process. First of all, open the live photo in the Photo app and click on Edit. After that, the live photo will be presented as a still.

Once you click the Live Photos icon, it will change from the previously blue color to white. Finally, you can click Done to save it as a still photo.
Can You Recover Lost Live Photos From Your iPhone?
It is possible to get your lost Live Photos back!
Download UltDta on your computer and connect your iPhone to it. Next, “Recover Data from iOS device” will pop up. Select Pictures, and under this, scan all the images on your phone.
After scanning, both the deleted and existing snapshots will be listed. Click on the Live Photos you need and tap Recover!
iPhone Live Photo Formats
Live Photos have four different formats, each with its own unique features. To access these formats, click “Live“ in the top left corner, which opens a menu showcasing them.
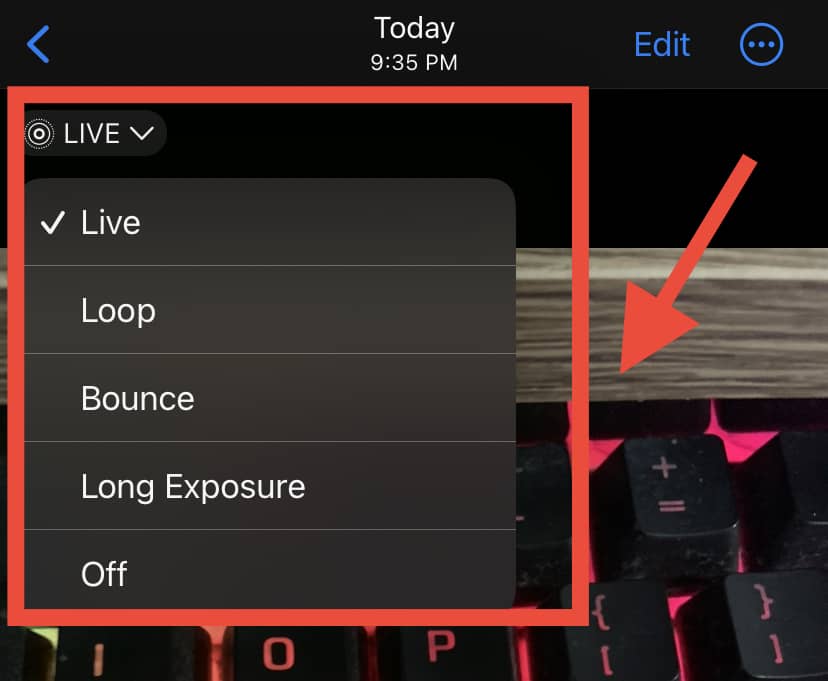
Below are the image types:
Live
This live photo format is the standard one. To play the tiny video clip you’ve taken, press down on the thumbnail that comes up and it will play until you lift your finger again.
This format has the live photo icon, which removes the sound of the video and edits other unwanted frames. In addition, to change it into a standard photo, simply click on “Live” at the top of the screen and it will appear as a single frame.
Loop
Loop is the perfect format if you want a live photo that blurs endpoints into each other. Interestingly, when you select this style, your live photo loops automatically!
One drawback of this image type is that it has fewer editing options. For example, it removes any audio automatically.
Additionally, this format makes it impossible to edit any part of the original photo that is looped.
Bounce
As its name implies, this style allows a clip to play once, and then it is reversed. It then bounces back and forth until it is stopped!
This format is similar to loop since it has limited editing options. One social media platform that loves this image type is Instagram.
It is likened to Instagram’s boomerang because it can help users show off their outfits in a dramatic and stunning spin by playing a brief video and then reversing it immediately.
Long Exposure
Long exposure produces an image that could previously only be achieved with dedicated cameras.
This option has the most innovative features of all live photo formats. In fact, you can capture motion in a single frame.
For instance, with long exposure, you can catch the beautiful movement of fireworks. Notably, it combines multiple frames of the video clip into a blurred image.
What Else Do You Need To Know About iPhone Live Photos?
Firstly, did you know that you can set a live photo as your iPhone lock screen wallpaper?
Simply select the live image you want to use on your lock screen, click the Share icon, and tap Use as wallpaper!
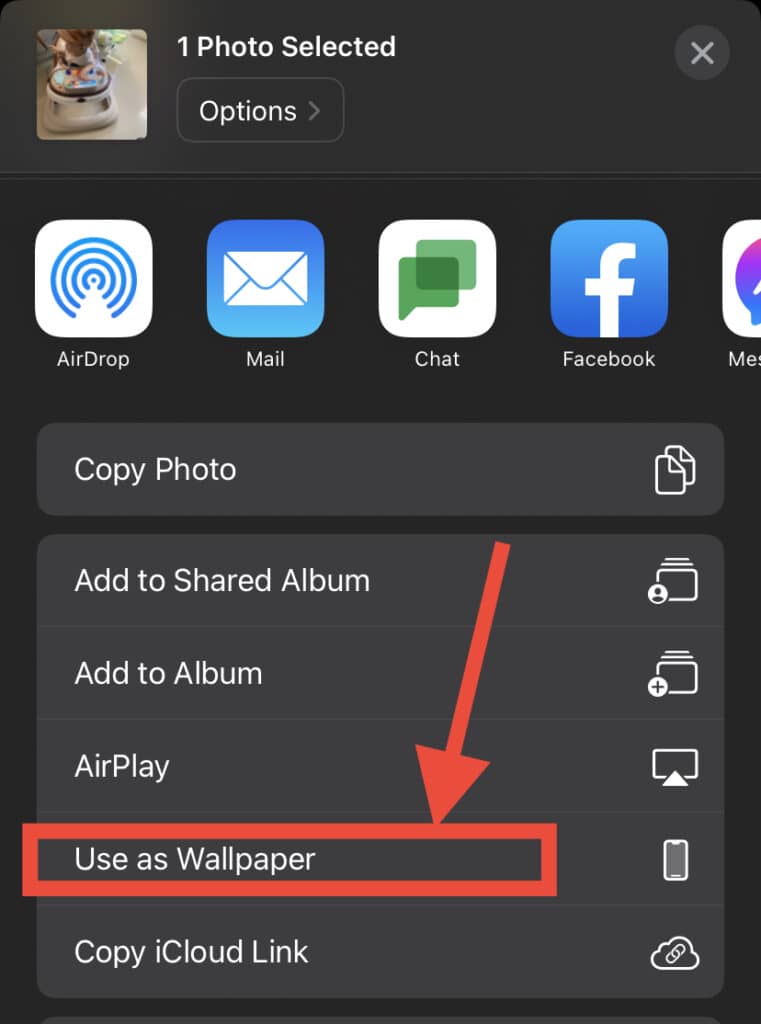
These live wallpapers still appear as traditional stills, however. To bring it to life, tap and hold the screen or activate 3D touch.
While Live Photos work on lock screens, there is no motion when you use them as your home screen wallpaper.
Secondly, while using the iPhone Live Photo feature, the audio option is always switched on unless changed manually.
As such, whatever sound you make or noises in the background will also be in the video. For this reason, always be aware of unnecessary discussions or comments that may spoil your Live Photos!
FAQs
1. How do I convert Live Photos to GIFs and other formats?
Although Live Photos are cool, few systems other than iPhone support this format.
For instance, you can’t send Live Photos to another phone that isn’t an iPhone. To share them anywhere else, you’ll need to convert them into GIF format.
The simplest way to change your Live Photo is by using an app. While many apps can transform Live Photos, only a few are actually efficient and effective.
One of the most efficient ones is “Lively.” This app not only converts your Live Photos to GIFs, but it can also convert them into a movie and extract a still image.
Additionally, with Lively, you can trim your clips as well. Another app that you can download to convert your Live Photos is Live GIF.
As its name implies, it helps users to change any live photo into a GIF. While the app has an attractive user interface, it does not offer any extra features.
2. How do I trim iPhone Live Photos and change the key photo?
As mentioned earlier in the article, Live Photos capture the brief moment before and after taking a shot.
The captured pictures are the key photo, and this is what you see when you check your photo album. Once you click it, it shows a full 3-second clip.
If you want to change this picture to another within the recording or trim out some unwanted footage, check through our guidelines below:
1. Click on your Live Photos album under Photos and open one of the clips. Tap Edit, which is in the top right corner.

2. After that, you will see all the frames in the video clip at the bottom. The original key photo is the one in the white box. Slide the box to the frame you want to set as the new key photo.
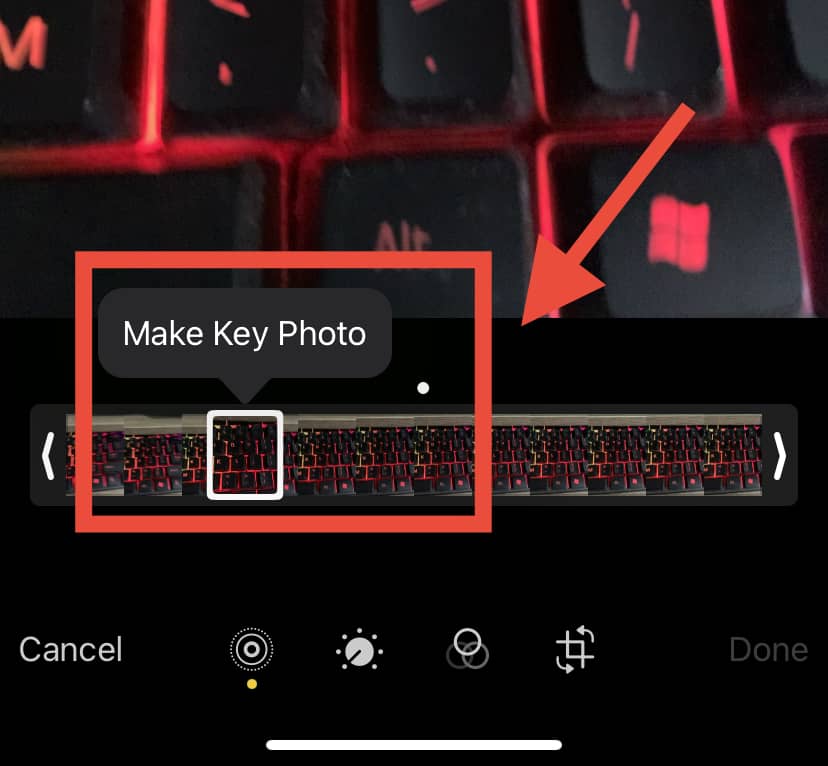
Then click Done to save your editing.
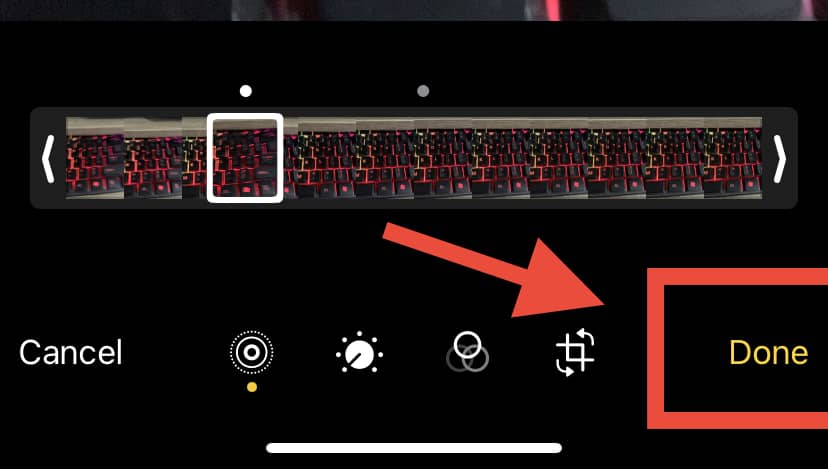
3. To trim the video clip, click and hold on either the left or right arrow at the ends of the frame until a yellow box surrounds it.
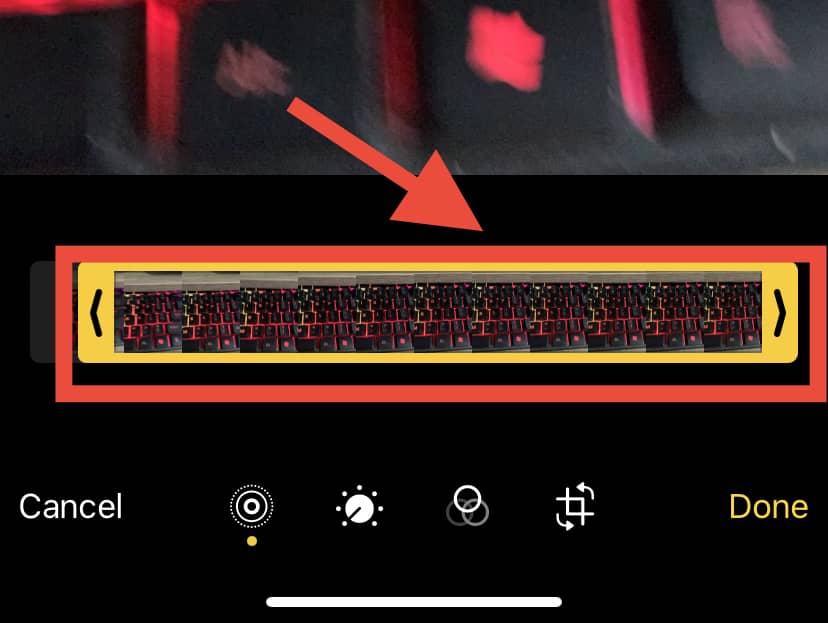
4. After that, slide the arrows to cut out unwanted frames and tap Done.

5. You can revert your changes if you are not satisfied with your editing.
3. How do I combine iPhone Live Photos into videos?
1. First, click on the desired live photo in the album. Then, tap on the Share icon located at the bottom left of your screen.
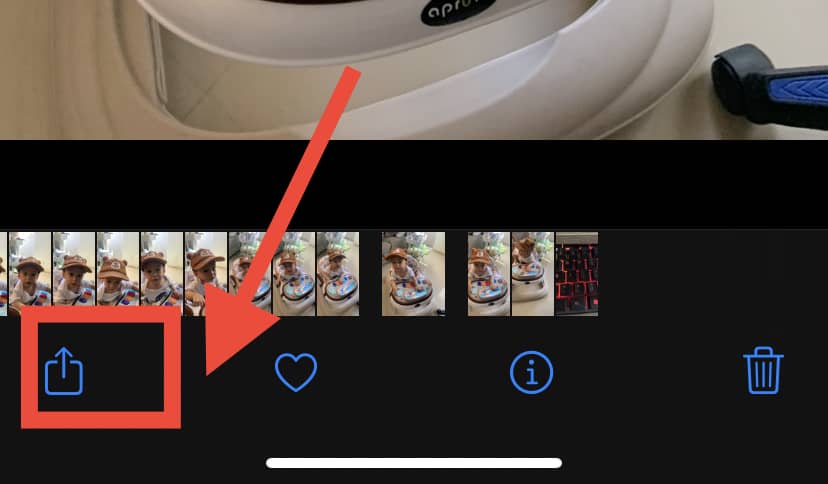
2. Select Save As Video
3. To make multiple Live Photos into a single video, click the Select button at the top right of your live photo album home page.
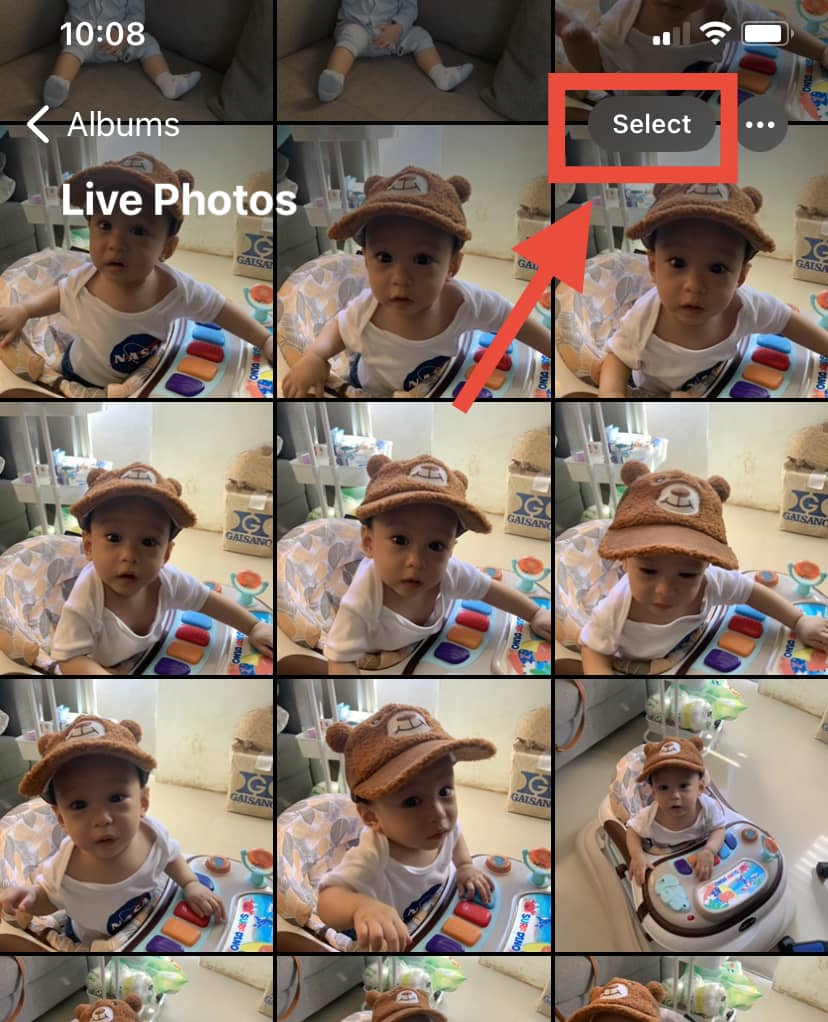
4. Choose all the Live Photos you want to use and click the Share button, then Save as Video. The new video will appear in your Videos album.

In Conclusion
Live Photos give more meaning to still pictures. They bring even more enjoyment out of otherwise ordinary images!
With Live Photos, you can capture the briefest precious moments in greater detail. How priceless is catching the innocent twinkle in the eyes of your child as he blows out his birthday candle?
Other examples of awe-inspiring moments can include a dolphin diving into the water and the ensuing ripples that appear on the surface.
Of course, this iPhone feature has its share of drawbacks, but the advantages far outweigh the downsides.
Live Photos trigger incomparable emotions when you stumble on the brief video snippets months or years later. It’s no wonder this feature is becoming increasingly popular among iPhone users today!
Don’t cut yourself off from the amazing benefits and greater details on offer with Live Photos – they’re a great way to make the best use of your premium Apple device.
