An iPhone is undeniably an excellent camera phone. Other smartphones may have better performance in specific areas of video and photography, but iPhones present a well-rounded package.
From the intuitive nature of the camera app to the smoothness of iOS, amateur and professional photographers alike enjoy using iPhones for their photo-taking needs!
As a long-time Apple user myself, I must have collected thousands of precious photos by now.
However, are you wondering how to NOT transfer photos to new iPhones when restoring from an old iPhone?
Is this even possible?
As a matter of fact: yes, it is! You can back up your pictures on iTunes, deselect the Sync Photos option, and then connect your iPhone.
You will still have all your apps – but no photos! Alternatively, you can switch on the Optimized Storage feature or make an iCloud backup and clear your iPhone.
How Can I Switch iPhones Without Transferring Photos?
You may need to switch Apple devices for numerous reasons. However, switching to a device that’s smaller in capacity than your current iPhone can mean that you’re unable to perform a complete restoration on it.
An example is when it will take weeks to repair your iPhone, during which you will have to switch devices. While you need to keep using all your other apps, you may not have enough space for all your media.
Therefore, you may need to restore your apps and settings without including media. Here are some ways you can switch Apple devices without transferring your photos!
First Solution: Avoid Photo Restoration
The process of not transferring photos in the restoration process is easy. Be sure you back up your phone before you begin!
Using iTunes, you can carry out a local backup on your computer. You could also do the backup online via iCloud. This process leaves all your photos on your current iPhone intact. Here are the steps to follow:
- Begin by confirming that the backup has your latest photos.
- Next, use a Lightning cable to connect your iPhone to the computer. Your phone should show up on iTunes. Click its icon, then deselect the Sync Photos option from the left column.
- Proceed to sync the phone, after which you need to perform a backup.
- Once the backup is complete, disconnect your current iPhone and connect the replacement unit.
- Wait to see the replacement device on iTunes. When you see it, go to Summary and select Restore iPhone. Select the backup you just made of your iPhone to restore.
- You will now have the settings and apps on your new device without the photos.
You can also make a backup on an external hard drive. Not only will the photos be safe, but you will also have a copy if you wish to edit them on a PC.
Second Solution: Fresh Start
What if you need to set up your iPhone as new? You may have grown tired of your old photos but still want to set up your new iPhone as before. You might also be worried about your photo and video collection size.
If you don’t want your photo collection on your new phone, you can’t afford a complete restoration. There is a way to create a backup that does not contain photos and videos through the Optimize Storage feature.
Optimize Storage is an iCloud Photo Library feature that stores only the latest media on the phone. The rest of the collection is automatically uploaded to your iCloud, thus freeing up space on your phone.
Your backup will also not take up much space on the new phone when you restore it.
Setting up iCloud Photo Library
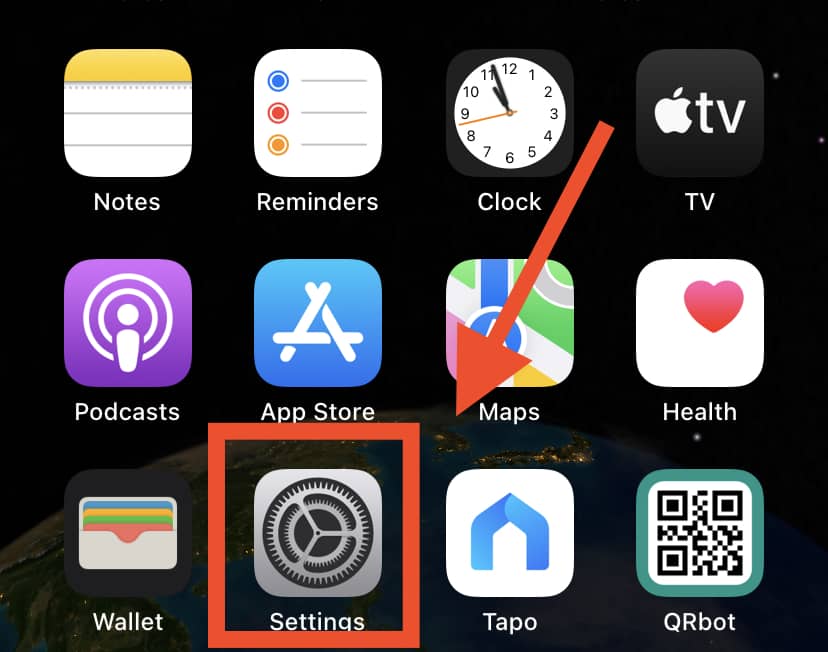
1. Go to your iPhone’s Settings and scroll down to or search for Photos.
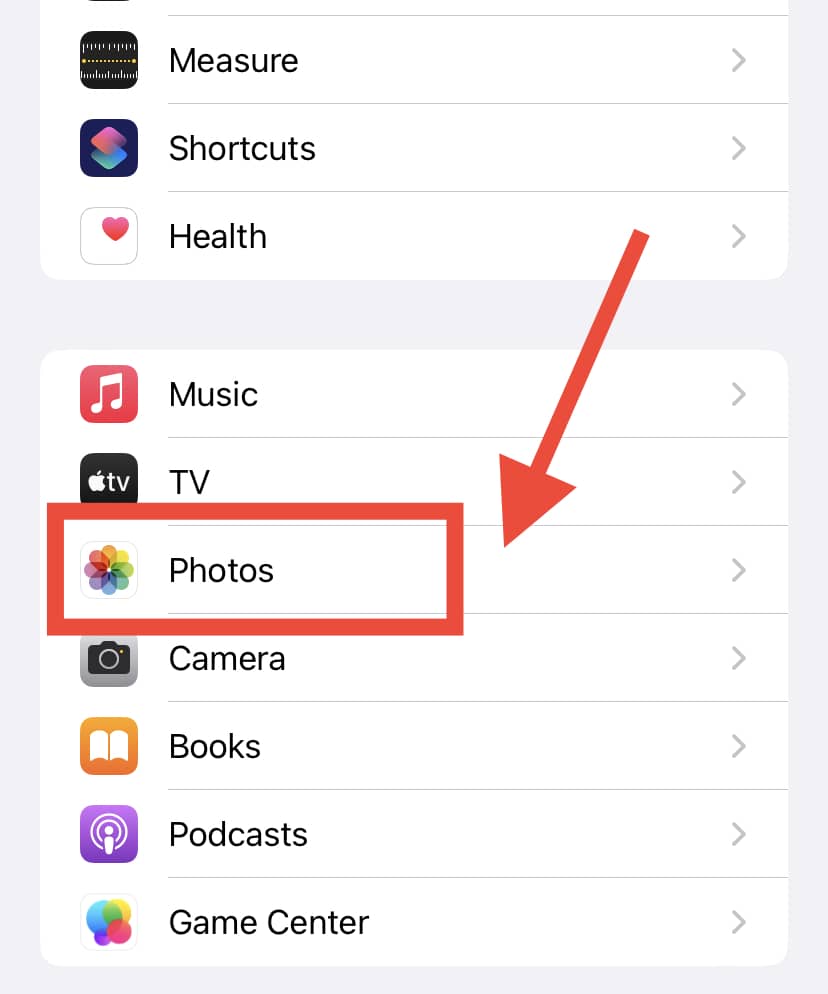
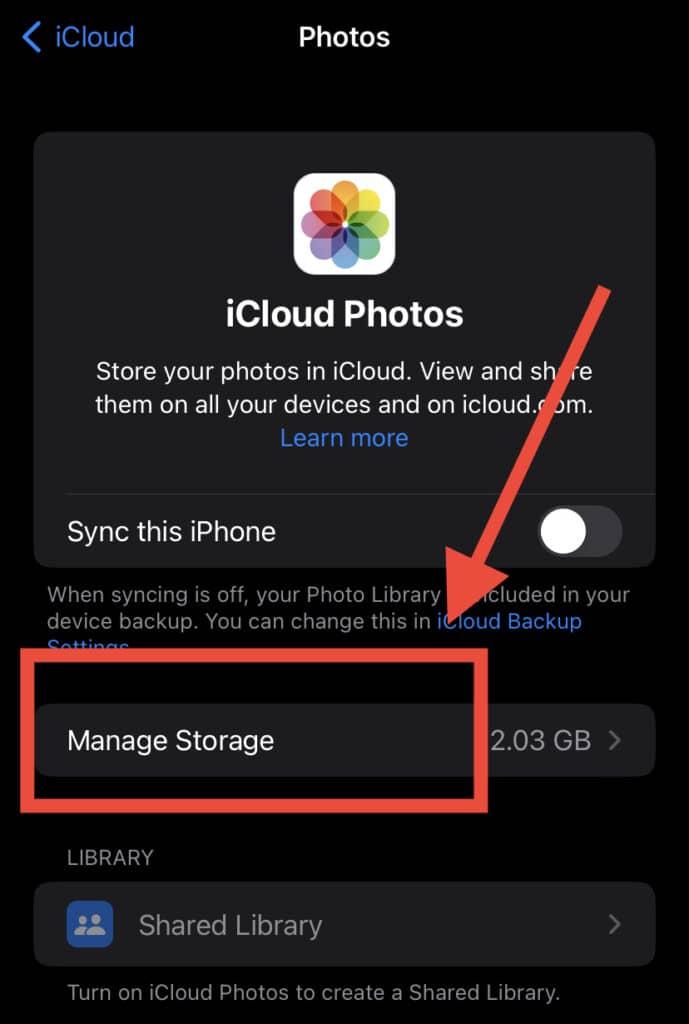
2. Scroll to the iCloud Photo Library. Proceed to toggle its switch to green.
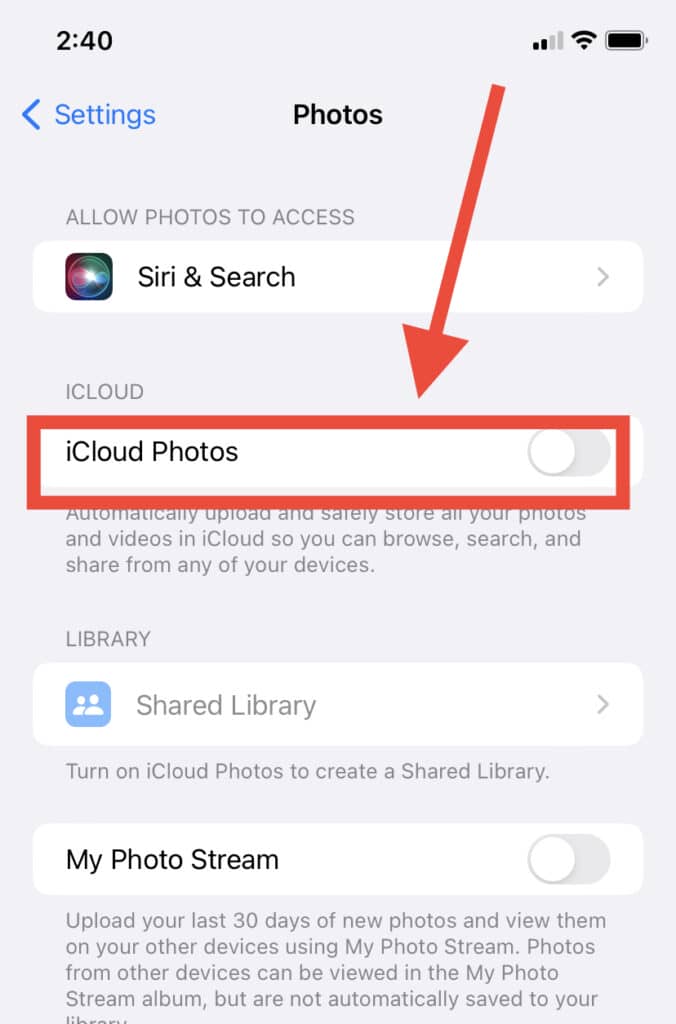
3. Toggle the Optimize Storage option on as well.
Third Solution: Clean Install, No Restore
The final solution is effective, but it requires some work. It’s always best to back up your old iPhone, but you won’t be restoring from that backup with this method!
As much as you don’t need your old photo and video collection, it is crucial to preserve those memories.
A local backup is sufficient, and a copy of that local backup makes it even more secure. An iCloud backup allows you easy access in the future if you ever need it.
After performing the backup, you can wipe the old iPhone and dispose of it in several ways. You could sell it, give it to someone you know who needs it, or keep it as a backup unit. Apple accepts old units for recycling and will even pay you for it!
When you set up your new iPhone, you will get an option to restore your data from a backup. Instead, in this case, set up the iPhone as new.
You’ll keep your Apple ID and account, though you will need to install each of the apps you usually use. You will also have to customize your phone through its settings.
While it may take some time, the process gives you a chance to try out a new look and feel of the iPhone.
In Summary
Are you wondering how to not transfer photos to a new iPhone? There are several ways to do so! With a good backup of your current iPhone, you don’t have to worry about losing your precious memories.
One way to not transfer photos to a new iPhone is to set up your iPhone without restoring from a previous backup.
Alternatively, you can switch on the Optimize Storage on the iCloud Photo Library. You can also back up your photos on iCloud and then start fresh on your new phone.
Before restoring your phone or setting up a new one, always ensure there is a backup either locally or on iCloud. You can then decide to set up your new iPhone just like your previous one while avoiding transferring all your photos or starting completely afresh!
